Introduction to work in a biochemical laboratory

Measurement of volumes[edit | edit source]
Measuring vessels and other tools in the chemical laboratory[edit | edit source]
When preparing solutions and handling liquids, we use various laboratory containers and tools. They differ in the purpose for which they are to be used and in accuracy. Maintaining the temperature is important because the density of the liquid changes with temperature.
Measuring vessels are usually calibrated at 20°C (US 25°C). The calibration temperature is marked on each measuring container.
| Aid | Ususal volume range | Acurracy |
|---|---|---|
| Erlenmeyer flask, beaker | 5–5000 ml | indicative only |
| Measuring flask | 5–2000 ml | high |
| Graduated cylinder | 5–2000 ml | medium |
| Burette | 1–100 ml | high |
| Pasteur pipette, dropper | 1–5 ml | small |
| Glass pipette | 1–100 ml | high |
| Automatic pipette | 5–5000 μl | high |
| Automatic dispenser | 0,1–100 ml | medium |
| Micro syringe | 0,5–1000 μl | high |
| Piston valve dispenser | 1–500 ml | medium |

Beakers[edit | edit source]
They are used for indicative determination of liquid volumes. In addition to rough measuring of volumes, beakers are mainly used for dissolving substances, diluting liquids, heating and other laboratory operations. Because of the low measurement accuracy, they are usually not even classified as measuring containers.
Measuring flasks and measuring cylinders[edit | edit source]

Measuring flasks and measuring cylinders are calibrated "for filling", which is marked on them with the mark D according to the Czech dolít or IN according to the English include. After filling up to the appropriate line, the liquid inside the container has the exactly indicated volume. If we pour the liquid into another container, a certain amount will remain in the form of a thin film or drops on the walls, so by pouring we transfer less than the indicated volume.
Volume is usually given in milliliters. When measuring, the container must stand on a firm, horizontal support. The correct volume is measured if the meniscus of the liquid touches the mark on the container with its lower edge. Measuring cylinders are only used for approximate measuring, measuring flasks are used to prepare solutions with a precise concentration.
Burettes, pipettes, dispensers and syringes[edit | edit source]
Burettes, pipettes, dispensers and syringes measure the volume of liquid taken into another container.
Pipettes and burettes are usually calibrated "for pouring" , marked V according to Czech vílít or Ex according to English exclude. The liquid flowing from them from the respective lines has the indicated volume. Do not blow out the contents of the pipette, even if a drop remains in the tip. Its volume is taken into account during calibration.

- Burettes They are used in titrations, or where the same volume of liquid is repeatedly measured. These are glass or plastic calibrated tubes closed by a cock. The burette is fixed vertically to the stand using a holder. With the tap closed, it is carefully filled with the appropriate liquid using a funnel. The funnel is removed and by slightly opening the stopcock, such an amount of liquid is released that its lower meniscus touches the mark. Then the burette is ready for titration. The titration agent is discharged through the stopcock and its volume is monitored on the scale. One of the most important actions when working with a burette is the correct reading of the volume. It is always read twice on the burette. The first time when determining the zero mark, the second time when subtracting the drained volume. Since the change in volume is subtracted, the method of subtraction does not matter much. However, it must always be subtracted in the same way.
- Automatic burettes are used in routine laboratories.

- Glass pipettes They are rarely used to measure volumes in modern routine laboratories and are being replaced by semi-automatic dispensers. The volume of glass pipettes can be different, from 1 to 100 ml. They can be either undivided, designed to measure a single volume, or divided - usually in milliliters and tenths of milliliters. The scale can point from the tip towards the top edge or vice versa.
- For safety reasons, we never suck the solution into the pipette by mouth - different types of attachments or pistons are used to draw it.
- When suctioning, the pipette must not rest on the bottom of the container. Before measuring the sample, the pipette is first filled with the solution and the collected volume is drained into the waste container. Only then is the exact volume taken and transferred to a container for further processing. The solution must never enter the pipette tip.
- Automatic pipettes (pipettors, micropipettes, microdispensers) One option for measuring small volumes is the use of automatic pipettes.


See the Automatic Pipettes page for more detailed information.
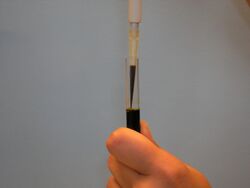
- Microsyringes
- It is used for precise dosing of small amounts (0.1–1000 μl) of liquids. They consist of a needle attached to a graduated glass cylinder in which a piston moves. Individual types differ in needle and piston diameters.
- Piston valve dispenser
- They consist of a piston with a scale, which is mounted on a storage bottle. They enable the repeated dosing of a certain volume of liquid from the storage bottle. Dosers intended for dosing aggressive chemicals (e.g. strong acids) have glass parts made of borosilicate glass, plastic parts that are in contact with the liquid are made of PTFE, other parts are made of PE or PP. In modern types of dispensers, dosing is automated using control modules.


Automatic pipettes[edit | edit source]
According to the control metd, we distinguish between manual and electronic automatic pipettes. In manual pipettes, the plunger is moved with the thumb using the control button. The correctness and accuracy of pipetting is significantly influenced by the experience and skill of the worker. In the case of electronic pipettes, the piston is moved by an electric motor. Compared to manual methods, it also offers programming of the pipetting method. Depending on the nature of the liquid, you can choose a different speed of piston movement when sucking in and expelling the liquid.
A disposable tip is attached to the body of the pipette (also called pipetor ). The pipetted liquid comes into contact only with this tip.
According to the principle of their operation, automatic pipettes can be divided into two basic types:
- „Air displacement“ pipettes
- This type of pipette uses the so-called air cushion principle. A certain volume of air always remains between the piston and the liquid. The volume of liquid drawn into the tip by the pipettor may differ slightly from the volume of air drawn in or pushed out by the piston, depending on the density and viscosity of the pipetted liquid, the wettability of the tip surface by the pipetted liquid, temperature and atmospheric pressure, and other influences. Therefore, the pipettor must be regularly calibrated and adjusted.
- Pipettes of this type are distinguished according to their design as single-channel (intended for pipetting one volume of a given liquid in time) or as multi-channel (most often eight or twelve-channel) intended for simultaneous pipetting of the same volume of a given liquid into several wells in a microtiter plate . Each channel in multi-channel pipettes has its own piston, therefore it is not necessary to use all channels at once (less than 8 or 12 tips can be connected).
- Automatic pipettes are designed either for one fixed volume or are adjustable for multiple volumes. Changing the volume setting is possible within a certain range (e.g. 10-100 μl) using the adjusting screw or knob.
- „Positive displacement“ pipettors This type of pipette sucks liquid into the tip directly without creating an air cushion, i.e. the piston is in direct contact with the measured liquid. The liquid sucked into the tip (without air bubbles) is discharged all at once (syringe type) or in steps of the same volume (stepper pipette ) . This type of pipettor is convenient to use for highly viscous or volatile liquids, or for repetitive pipetting.
Ways to use a pipettor[edit | edit source]

Direct pipetting[edit | edit source]

This is the most commonly used pipetting technique. During direct pipetting, a precisely set volume is sucked into the tip and in the next step it is completely pushed out of the tip into the selected container. Because a certain amount of liquid remains on the inner surface of the tip as a thin film, it is necessary to wet the tip with the measured liquid before pipetting. The direct pipetting technique is used for measuring most aqueous solutions, buffers , dilute acids and bases.
Method[edit | edit source]
- Place the tip on the dispenser. Press the controller button to the first position (a small resistance must be overcome when pressing the button).
- Dip the tip of the dispenser about 2-3mm below the solution level. Slowly release the pressed button on the controller while sucking the sample into the tip.
- By slowly sucking the liquid into the tip, the possible formation of turbulence is limited, which can cause the formation of aerosol and gas bubbles coming out of the liquid. The optimal suction speed depends on the properties of the liquid (its density, vapor tension and viscosity).
- Always check whether air bubbles have entered the tip (e.g. when the actuator piston is opened more sharply or the tip is incorrectly fitted).

- For greater pipetting accuracy, remove your thumb completely from the controller button once it reaches the home position.
- By slowly sucking the liquid into the tip, the possible formation of turbulence is limited, which can cause the formation of aerosol and gas bubbles coming out of the liquid. The optimal suction speed depends on the properties of the liquid (its density, vapor tension and viscosity).
- Slowly withdraw the tip from the liquid. Some of the contents of the tip may be lost when pulled out quickly. Wait, especially for larger 500-5000 μL pipettors, about 1-3 seconds before pulling the tip out of the liquid.
- When expelling the liquid, hold the tip at a slight angle against the wall of the container (10-45º), just above the solution already in it, and smoothly press the control button with your thumb to the first position. Wait about 1 second and continue to quickly press the controller button to the second position (you will feel more resistance when pressed). Make sure that no droplets of liquid remain in the tip or splash on the walls of the container.


5. Hold down the controller button and pull the tip out along the wall of the container. Now enable the controller button.
In direct pipetting, a certain error is created by the fact that a very thin film of the transferred liquid remains on the inner surface of the tip. With the mentioned procedure, we measure a slightly smaller volume than is set on the pipette, while the error depends mainly on the properties of the pipetted liquid and the material from which the tip is made. This error can be eliminated by wetting the inner surface of the tip with the measured liquid before pipetting. In practice, this means that we first suck the solution into the tip using the procedure described above, but instead of measuring it into the target container, we return it back to the storage container. At this moment, a film of pipetted liquid is formed on the inner wall of the tip, in the case of colorless solutions it is invisible to the eye with the correct technique. This is followed by measuring the liquid exactly according to the above procedure (only we do not insert a new tip). Since the amount of liquid,
If drops remain on the outer wall of the tip, it is possible to wipe them with a cotton wool with a light movement from top to bottom. Never touch the mouth of the tip with the pulp, otherwise you will suck out some of the liquid inside.

Reverse pipetting[edit | edit source]

During reverse pipetting, we draw a larger volume of liquid into the tip than we want to measure, and in the next step we push out the volume set on the pipette from the tip. This method of pipetting gives better results when working with viscous or highly volatile liquids, strongly wetting liquids and solutions that foam. It is also suitable for measuring very small volumes. After pipetting, there is always a residue of liquid in the tip, which can be squeezed back into the storage container or into the waste before removing the tip itself.
Method[edit | edit source]
- Press the button to the second position (you will feel first a weak and then a greater resistance of the piston when pressing the button of the controller).
- Dip the tip of the pipette about 2-5 mm below the surface of the solution. Slowly release the plunger while sucking the sample into the tip.
- Slowly withdraw the tip from the liquid and remove any droplets adhering to the outer wall of the tip by touching the tip to the rim of the container.
- When expelling a given volume of liquid, hold the tip at a slight angle against the wall of the container just above the solution already in it, and slowly and smoothly press the control button to the first position with your thumb.
- Hold the controller button down in this position and pull the tip out of the container.
- Push the part of the liquid that remains in the tip back into the original container or into the waste by pressing the controller button to the second position.
- Hold the controller button down and pull the tip out of the liquid, then release the controller button.
Repeat pipetting[edit | edit source]

This method of pipetting is intended for repeated pipetting of the same volume, e.g. for adding a reagent to a series of tubes or to wells in a microtitre plate. This is actually repetitive reverse pipetting. After sucking the liquid into the tip, repeat steps 2 to 4.
Pipetting heterogeneous samples[edit | edit source]
A technique suitable for pipetting heterogeneous samples such as blood, when it is not easy to rinse the tip before pipetting. It is similar to the direct technique, but the tip is not pre-wetted with the measured liquid. Instead, after the liquid has been transferred, it is repeatedly flushed with the solution with which the metered liquid is mixed.
Method[edit | edit source]

- SPress the button to the first position and dip the tip of the dispenser about 2-5 mm below the level of the solution.
- Slowly release the plunger while sucking the sample into the tip.
- Slowly withdraw the tip from the liquid and remove the drops of solution adhering to the outer wall of the tip by pulling the tip along the wall of the container.
- Dip the tip of the dispenser into the target solution.
- Press the control button to the first position and then slowly release it to the original position. This will draw the solution into the tip. Do not remove the tip from the solution and repeat this step until the inside of the tip is clean.
- Along the wall, pull the tip above the solution level and empty it by pressing the controller button to the second position.
- Hold down the controller button and pull the tip out of the container along the wall and then release the controller button.
Filtration[edit | edit source]

Filtration is used to separate the mixture based on particle size. The filtered mixture is poured onto a filter made of a suitable porous material. Particles that are smaller than the pores pass through the filter and enter the filtrate , while larger particles remain on the surface of the filter and form a so-called filter cake.
Filter[edit | edit source]
The filter can be made of a variety of materials. Among the longest used are filter papers - special unglued papers with suitable porosity. Mulch, cotton wool, mineral ("glass") wool, etc. can also be used to filter out coarser particles. On the contrary, filter membranes made of cellulose acetate, PVDF, nylon and other materials are used to separate smaller particles.
Filtration arrangement[edit | edit source]
Filtration of solutions through membranes with very fine pores would often be time-consuming. It can be accelerated, for example, by increasing the pressure of the filtered liquid (overpressure filtration) or, conversely, by suctioning off the filtrate (vacuum filtration).
The simplest example of overpressure filtration can be the use of syringe filters - the filtered mixture is sucked into a syringe, to which a filter membrane enclosed in a housing is connected. Pressure on the syringe piston creates overpressure.
Syringe filters are used, for example, to sterilize solutions such as eye drops in pharmacies.
Centrifugal filters also work on a similar principle . In this case, the compound filter unit resembles a test tube or microtube. After filling the part for the filtered mixture, it is placed in a centrifuge , the filtration is accelerated due to centrifugal forces.
Vacuum filtration, on the other hand, is based on extracting the filtrate. In the classic arrangement, the filter membrane is placed on a Büchner funnel, which is connected via a suction flask to a vacuum. Disposable filter units for vacuum filtration made of suitable plastic are commercially available today.


Filtration through a paper filter
- A wheel of filter paper is folded into quarters. Then it unfolds to form a cup.
- The folded filter is inserted into the funnel. It is often advisable to moisten it (usually with distilled water).
- During filtration, the stem end of the funnel should touch the wall of the collection container. The filtered mixture is poured onto a triple layer of filter paper.
- The filtered mixture must be added gradually. It should never reach the edge of the filter so as not to overflow it.
Centrifugation[edit | edit source]
Centrifugation [4][5][6] serves to separate particles using centrifugal force. It is often about accelerating sedimentation . While during sedimentation the particles are divided according to their density due to gravitational acceleration, during centrifugation they are affected by a much greater centrifugal acceleration. Therefore, the separation of the mixture takes place much faster.
In the simplest cases, centrifugation is used to separate solid particles from a suspension , eg to remove clots or blood cells from whole blood . Using centrifugation, it is also possible to separate mixtures of immiscible liquids. Using the high speeds achieved in high-speed centrifuges and ultracentrifuges, individual components of cells can also be separated from cell lysate or mixtures of macromolecules can be separated.
Centrifugal acceleration[edit | edit source]
It can be seen that the separation of the mixture during centrifugation will take place the faster the centrifuge rotor rotates. In practice, one usually works with a quantity referred to as relative centrifugal force ( relative centrifugal force, RCF). It indicates how many times the centrifugal acceleration is higher than the gravitational acceleration (g) and is usually given in multiples of g.
Let's imagine that we divide the same mixture into two test tubes. We will place one in a stand and let the mixture settle freely in it, the other will be centrifuged at 10,000× g. This means that the particles in the centrifuged tube will be subjected to a centrifugal acceleration ten thousand times greater than the gravitational acceleration that causes sedimentation in a free-standing tube.
It can be easily deduced that the relative centrifugation force depends on the radius of the centrifuge rotor and the number of revolutions:
RCF = 1.12 · n² · r · 10^-5[edit | edit source]
where RCF is the relative centrifugal force, n is the number of revolutions per minute of the rotor and ar is the radius of the rotor in centimeters.
The speed at which individual particles in the mixture will move during centrifugation is referred to as the so-called sedimentation speed. Under idealized conditions, it is proportional to the centrifugal acceleration (i.e. the relative centrifugation force) and the difference between the density of the particle and the medium in which it is dispersed. It also depends on the particle size and the viscosity of the mixture.
Instead of the sedimentation rate, one often works with the sedimentation coefficient - a quantity that describes the behavior of a specific particle regardless of the centrifugation conditions. The sedimentation coefficient actually corresponds to the sedimentation rate in a field with a unit acceleration (i.e. about 10x less than the gravitational acceleration). It is given in seconds, where applicable the multiple Svedberg unit is used (1 Svedberg = 1 S = 10^−13 s).
In the literature, we can find information that ribosome subunits have a "size" of 30 S and 50 S. This is actually how their behavior during ultracentrifugation of cell fractions is described. Very roughly, it can be said that if we let, for example, a 30 S subunit sediment in a free-standing test tube, i.e. with a gravitational acceleration of about 10 ms −2 , it would fall at a speed : 30 · 10−13 s · 10 ms−2 = 3·10−11 ms−1, which is less than a millimeter per year. In reality, they would not sediment at all, as diffusion would act against sedimentation . It is obvious that several orders of magnitude more acceleration is needed to separate ribosome subunits,

Centrifuges
If small relative centrifugation forces (up to 20,000× g or even less) are sufficient to process the material, relatively simple low-speed centrifuges can be used. For the sedimentation of very small particles, ultracentrifuges are used, the rotor of which works in a vacuum, thereby preventing its braking by air and heating. Ultracentrifuge components must withstand enormous forces and are therefore very demanding to manufacture; the price of ultracentrifuges is therefore high.
Between low-speed centrifuges and ultracentrifuges are the so-called high-speed centrifuges. They work without a vacuum, but can be used to achieve acceleration up to around 100,000 × g.
Centrifugation at higher speeds would result in sample heating due to air friction, and biological samples often have to be processed at low temperatures. Centrifuges are therefore often equipped with cooling.
Practical notes[edit | edit source]
Centrifuged samples must be inserted into the rotor so that the rotor is balanced. The centrifugal forces exerted by the individual samples on the rotor shaft must cancel each other out. In practice, this means that samples must be inserted into the rotor in such a way that there are always two tubes of equal weight in opposite positions. The higher the rotational speed used, the more precisely the rotor must be balanced. At low speeds, it is sufficient to use tubes of the same type for all samples and pipet the same volumes of samples into them. In ultracentrifugation, the tubes are weighed and the sample volume is adjusted so that opposite tubes have exactly the same weight.
Links[edit | edit source]
References[edit | edit source]
- ↑ ČMELÍK, Milan – MACHONSKÝ, Lubor – ŠÍMA, Zdislav. Fyzikální tabulky. 2. edition. Liberec : Technická univerzita v Liberci, 2005. 60 pp. ISBN 80-7372-009-4.
- ↑ Merck. Pyrex® Vacuum filtration system for 47 mm membranes [online]. [cit. 2018-06-20]. <https://www.sigmaaldrich.com/catalog/product/aldrich/slw5809kit?lang=en®ion=US>.
- ↑ VWR. Filtry centrifugační [online]. [cit. 2016-10-06]. <https://cz.vwr.com/store/product/553721/filtry-centrifugacni>.
- ↑ KODÍČEK, Milan. Biochemické pojmy. Výkladový slovník [online]. VŠCHT Praha, ©2007. [cit. 2009-10-28]. <http://147.33.74.135/knihy/uid_es-002/ebook.html>.
- ↑ LABÍK, Stanislav – BUREŠ, Michal – CHUCHVALEC, Pavel, et al. Příklady z fyzikální chemie online. Disperzní systémy. [online]. ©2008. The last revision 2008-12-10, [cit. 2009-10-28]. <http://old.vscht.cz/fch/prikladnik/prikladnik/p.html>.
- ↑ VÁVROVÁ, Jaroslava. Datový standard MZ ČR. Odstřeďování (centrifugace) [online]. ©2009. [cit. 2009-10-28]. <http://ciselniky.dasta.mzcr.cz/CD_DS4/hypertext/JVACO.htm>.