Pipetting


Forward pipetting This is the most frequently used technique. In forward pipetting, an exactly set volume of liquid is aspired to the tip and then it is delivered to a new vessel. This technique is recommended for pipetting of diluted aqueous solutions, bufers, diluted acids and bases.

Procedure:
- Attach a tip to the pipettor. Press the button to the first stop (it is necessary to overcome a slight resistance).
- Dip the tip approx. 2-3 mm under the solution level. Release the button slowly; the solution is aspired to the tip.
- Slow aspiration prevents tubulences that would lead to formation of aerosol and bubbles of gas dissolved in the solution. The optimal speed depends on properties of the liquid (density, tension of vapors and viscosity).
- Pay attention not to aspire air bubbles (e.g. when the piston is released to quickly or if the tip is not attached properly).

- Higher accuracy can be reached if the thumb is completely removed from the button after it has reached the released position.
- Slow aspiration prevents tubulences that would lead to formation of aerosol and bubbles of gas dissolved in the solution. The optimal speed depends on properties of the liquid (density, tension of vapors and viscosity).
- Take the tip off the liquid slowly. Fast removal may lead to loss of a portion of the content. Before removing the tip, wait several seconds especially when working with larger volumes (500–5000 μL).
- When necessary, wipe droplets from the external surface of the tip with tissue cloth. Never touch the orifice of the tip, the cloth would absorb a portion of the transfered volume.

- During delivery of the liquid, the tip should touch a wall of the vessel at an angle (10–45º). It should be just above the level of any liquid that already is in the vessel. Push the button to the first stop. Wait for approx. 1 second and push the button quickly to the second stop (a stronger resistance can be felt). No droplets should remain in the tip and no liquid should be splattered on the walls.
- Hold the button in the second position and remove the tip, still touching the wall of the vessel. Now you can release the button.


Forward pipetting brings a small error in the delivered volume as a thin film of pipetted solution remains on the inner walls of the tip. In other words, according to the described procedure a slightly smaller volume than required is delivered. This error depends on properties of measured liquid and of the tip. The error can be avoided if the inner wall of the tip is pre-rinsed with the measured liquid. Practically, liquid is first aspired to the tip. Then it is not delivered to a new vessel but returned back to the stock vessel. Now, a very thin film of pipetted liquid covers the inner wall of the tip (it is usually invisible). Pipetting according to instructions given above follows (without changing the tip). As the volume of liquid remaining in the tip is practically constant, exactly the set volume is measured.
Reverse technique
In reverse technique, a larger volume of solution is aspired to the tip. Then, an exaxt volume is delivered (and some liquid remains in the tip). This technique is suitable for very viscous or volatile liquids, biologic fluids, foaming solutions and for measuring very small volumes.

Procedure:
- Push the button to the second stop.
- Dip the tip 2–5 mm bellow the level of the solution. Slowly aspire the solution to the tip.
- Remove the tip slowly from the solution. If necessary, wipe droplets from the external surface of the tip.
- Deliver the liquid to a new vessel, pushing the button to the first stop only. The tip should touch the wall of the vessel similarly to the forward technique.
- Hold the button in the first position and remove the tip from the vessel.
- The liquid remaining in the tip can be returned to the stock vessel or thrown away.
Repetitive pipetting

This technique is used when the same volume of the same liquid is to be measured to several test-tubes or to many wells of a microtitration plate. It is similar to reverse pipetting where steps 2 to 4 are repeated several times.
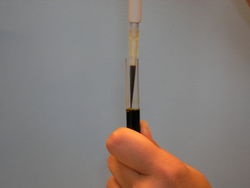
Pipetting of heterogenous samples This technique is suitable for heterogenous samples like whole blood. Pre-rinsing of the tip before pipetting is not easy in this case.

Procedure:
- Push the button to the first stop and dip the tip approx. 2–5 mm beneth the solution level.
- Slowly release the button. The sample is aspired to the tip.
- Remove slowly the tip from the solution and wipe droplets on the outer wall of the tip.
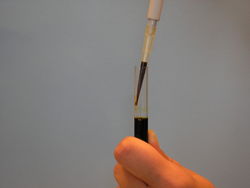
- Dip the tip into the target solution.
- Push the button to the first stop and then slowly release back. The solution will be aspired. Do not remove the tip from the solution and repeat this step until the inner wall of the tip is clean.
- Touching the wall of the vessel, place the tip above the level of the solution and push the button to the second stop.
- Hold the button at the second stop and remove the tip from the vessel.